Kinusaiga gives you the picture. Scripture gives it a voice.
There's a moment in kinusaiga that caught me off guard.
I was tucking one small piece of fabric into a groove. Then another. It's slow work — peel, place, tuck, trim. And the whole time, I was holding one short phrase in my head, turning it over."He will cover you with his pinions." Psalm 91:4
That's when it clicked for me. Kinusaiga does the same thing Bible journaling does. It slows you down long enough for a verse to actually sink in.
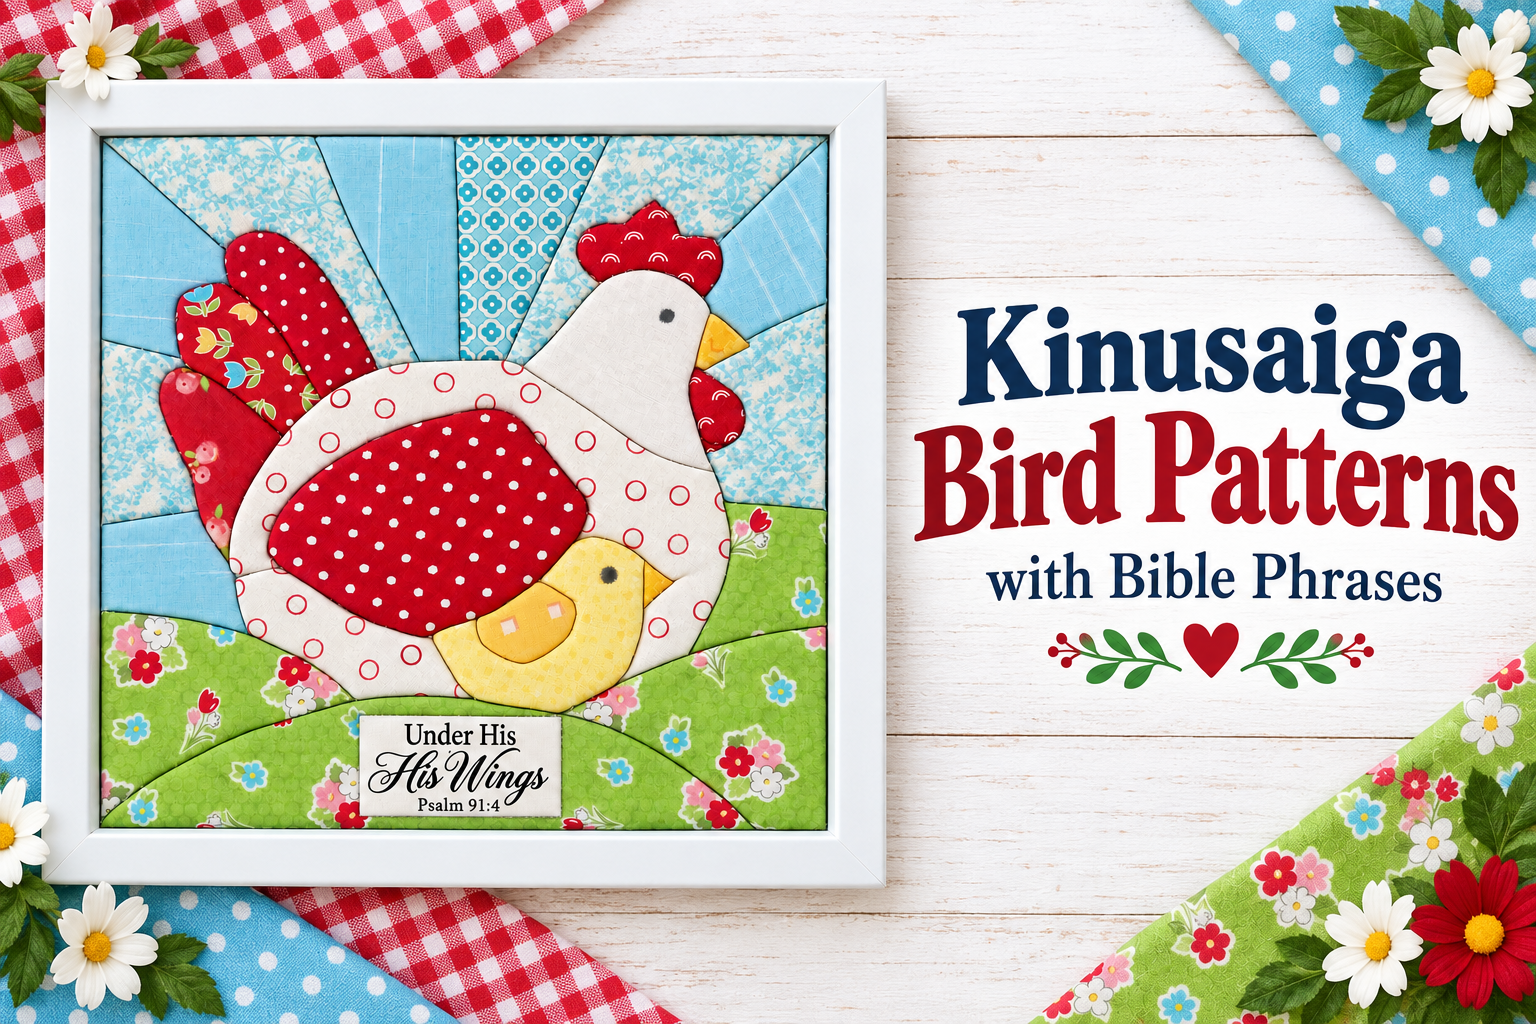
If you have ever made a Kinusaiga piece, you know how satisfying it is to see beautiful fabric tucked neatly into foam without a single stitch. But adding Scripture gives your creation a deeper purpose. It becomes more than pretty décor.
Like God’s command to write His words on the doorposts of our homes, it places His truth where we will see it, remember it, and share it with others.“You shall write them on the doorposts of your house and on your gates.” Deuteronomy 6:9
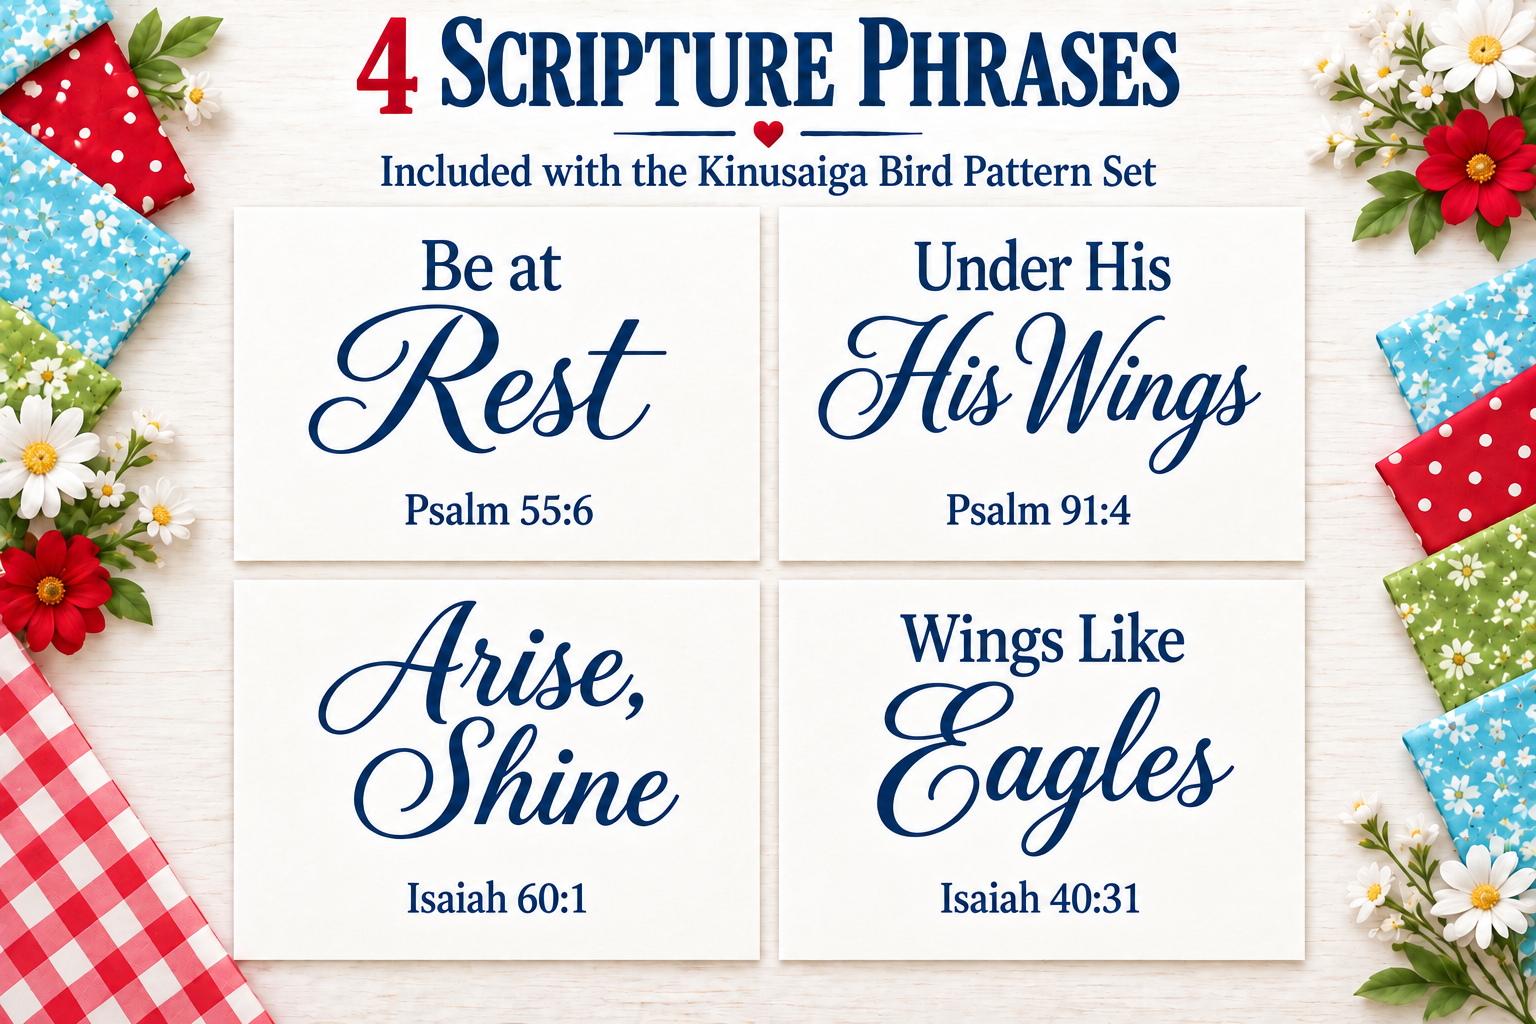
Under His Wings Kinusaiga
The "Under His Wings' phrase reminds us of Psalm 91:4 "He will cover you with his pinions, and under his wings you will find refuge; his faithfulness is a shield and buckler." God provides intimate, fierce, and unwavering protection, just like a mother bird sheltering her young.
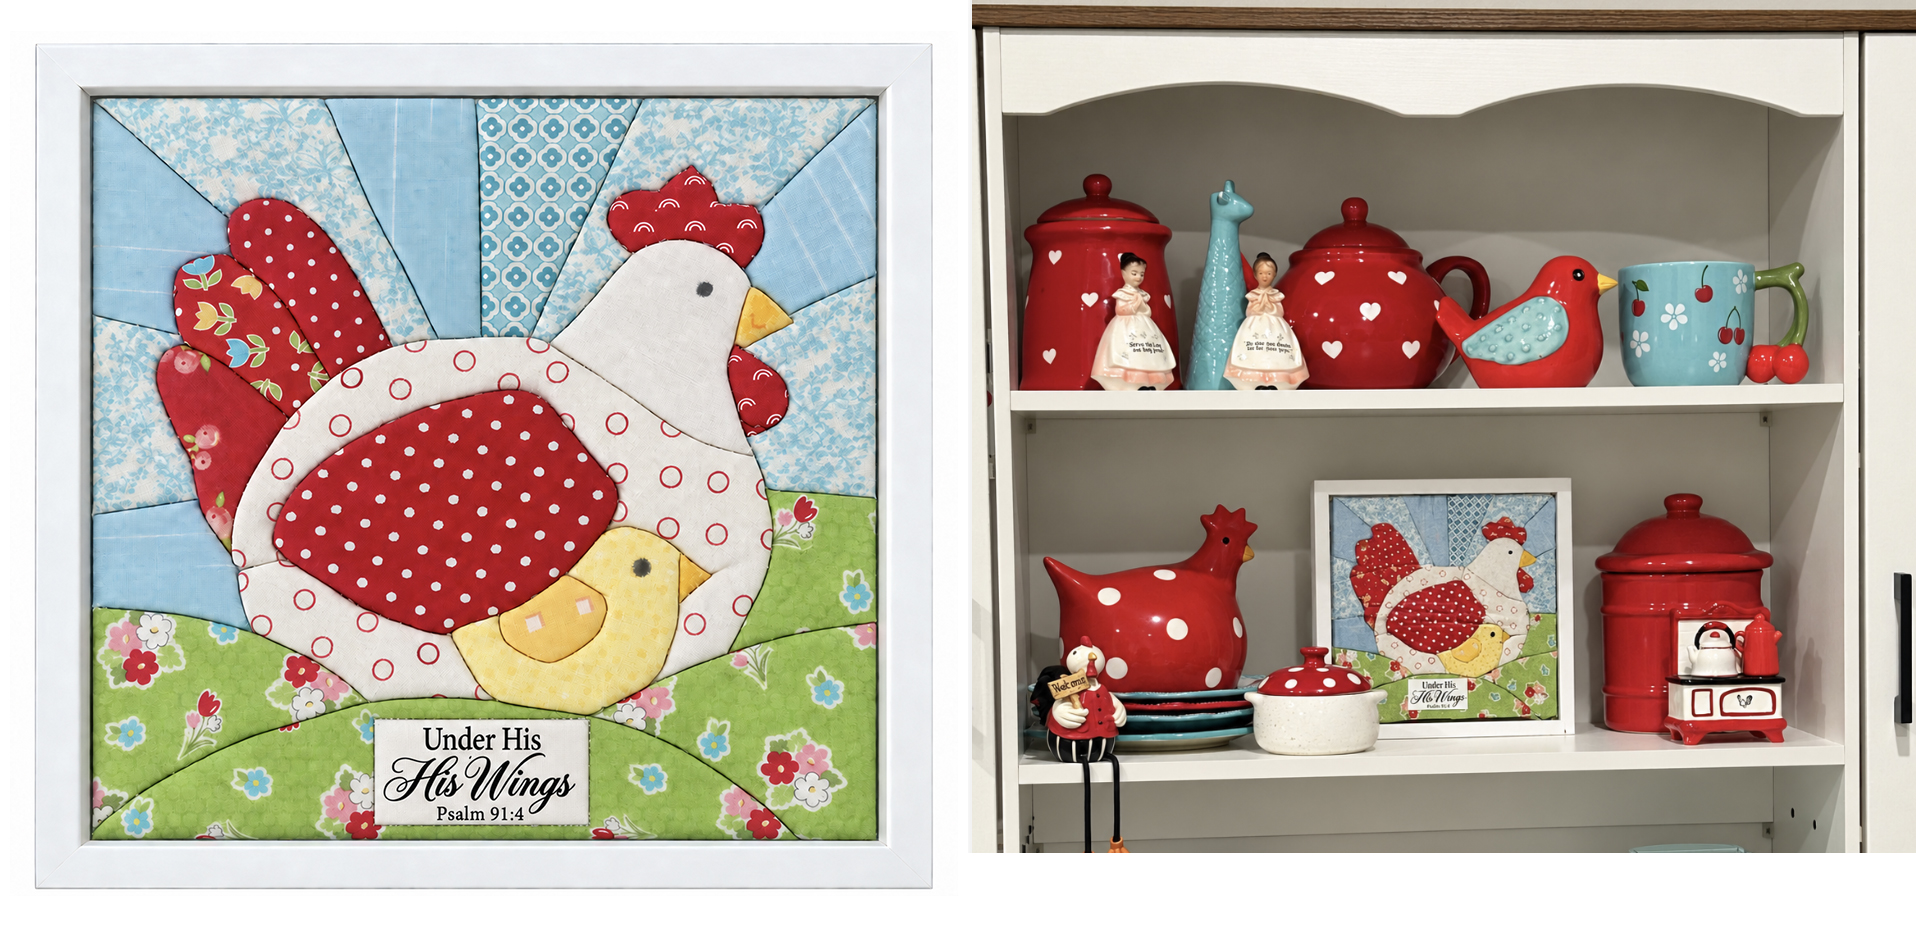 It's is a gentle metaphor showing that God is a safe hiding place during life's storms and fears. God covering you with His feathers means His care is not distant; it is near, tender, and personal. His faithfulness acts as a shield and rampart (or armor), guarding you against unseen dangers and daily troubles.
Arise, Shine Kinusaiga
The arise, shine phrase comes from Isaiah 60:1 which says: "Arise, shine, for your light has come, and the glory of the Lord rises upon you."
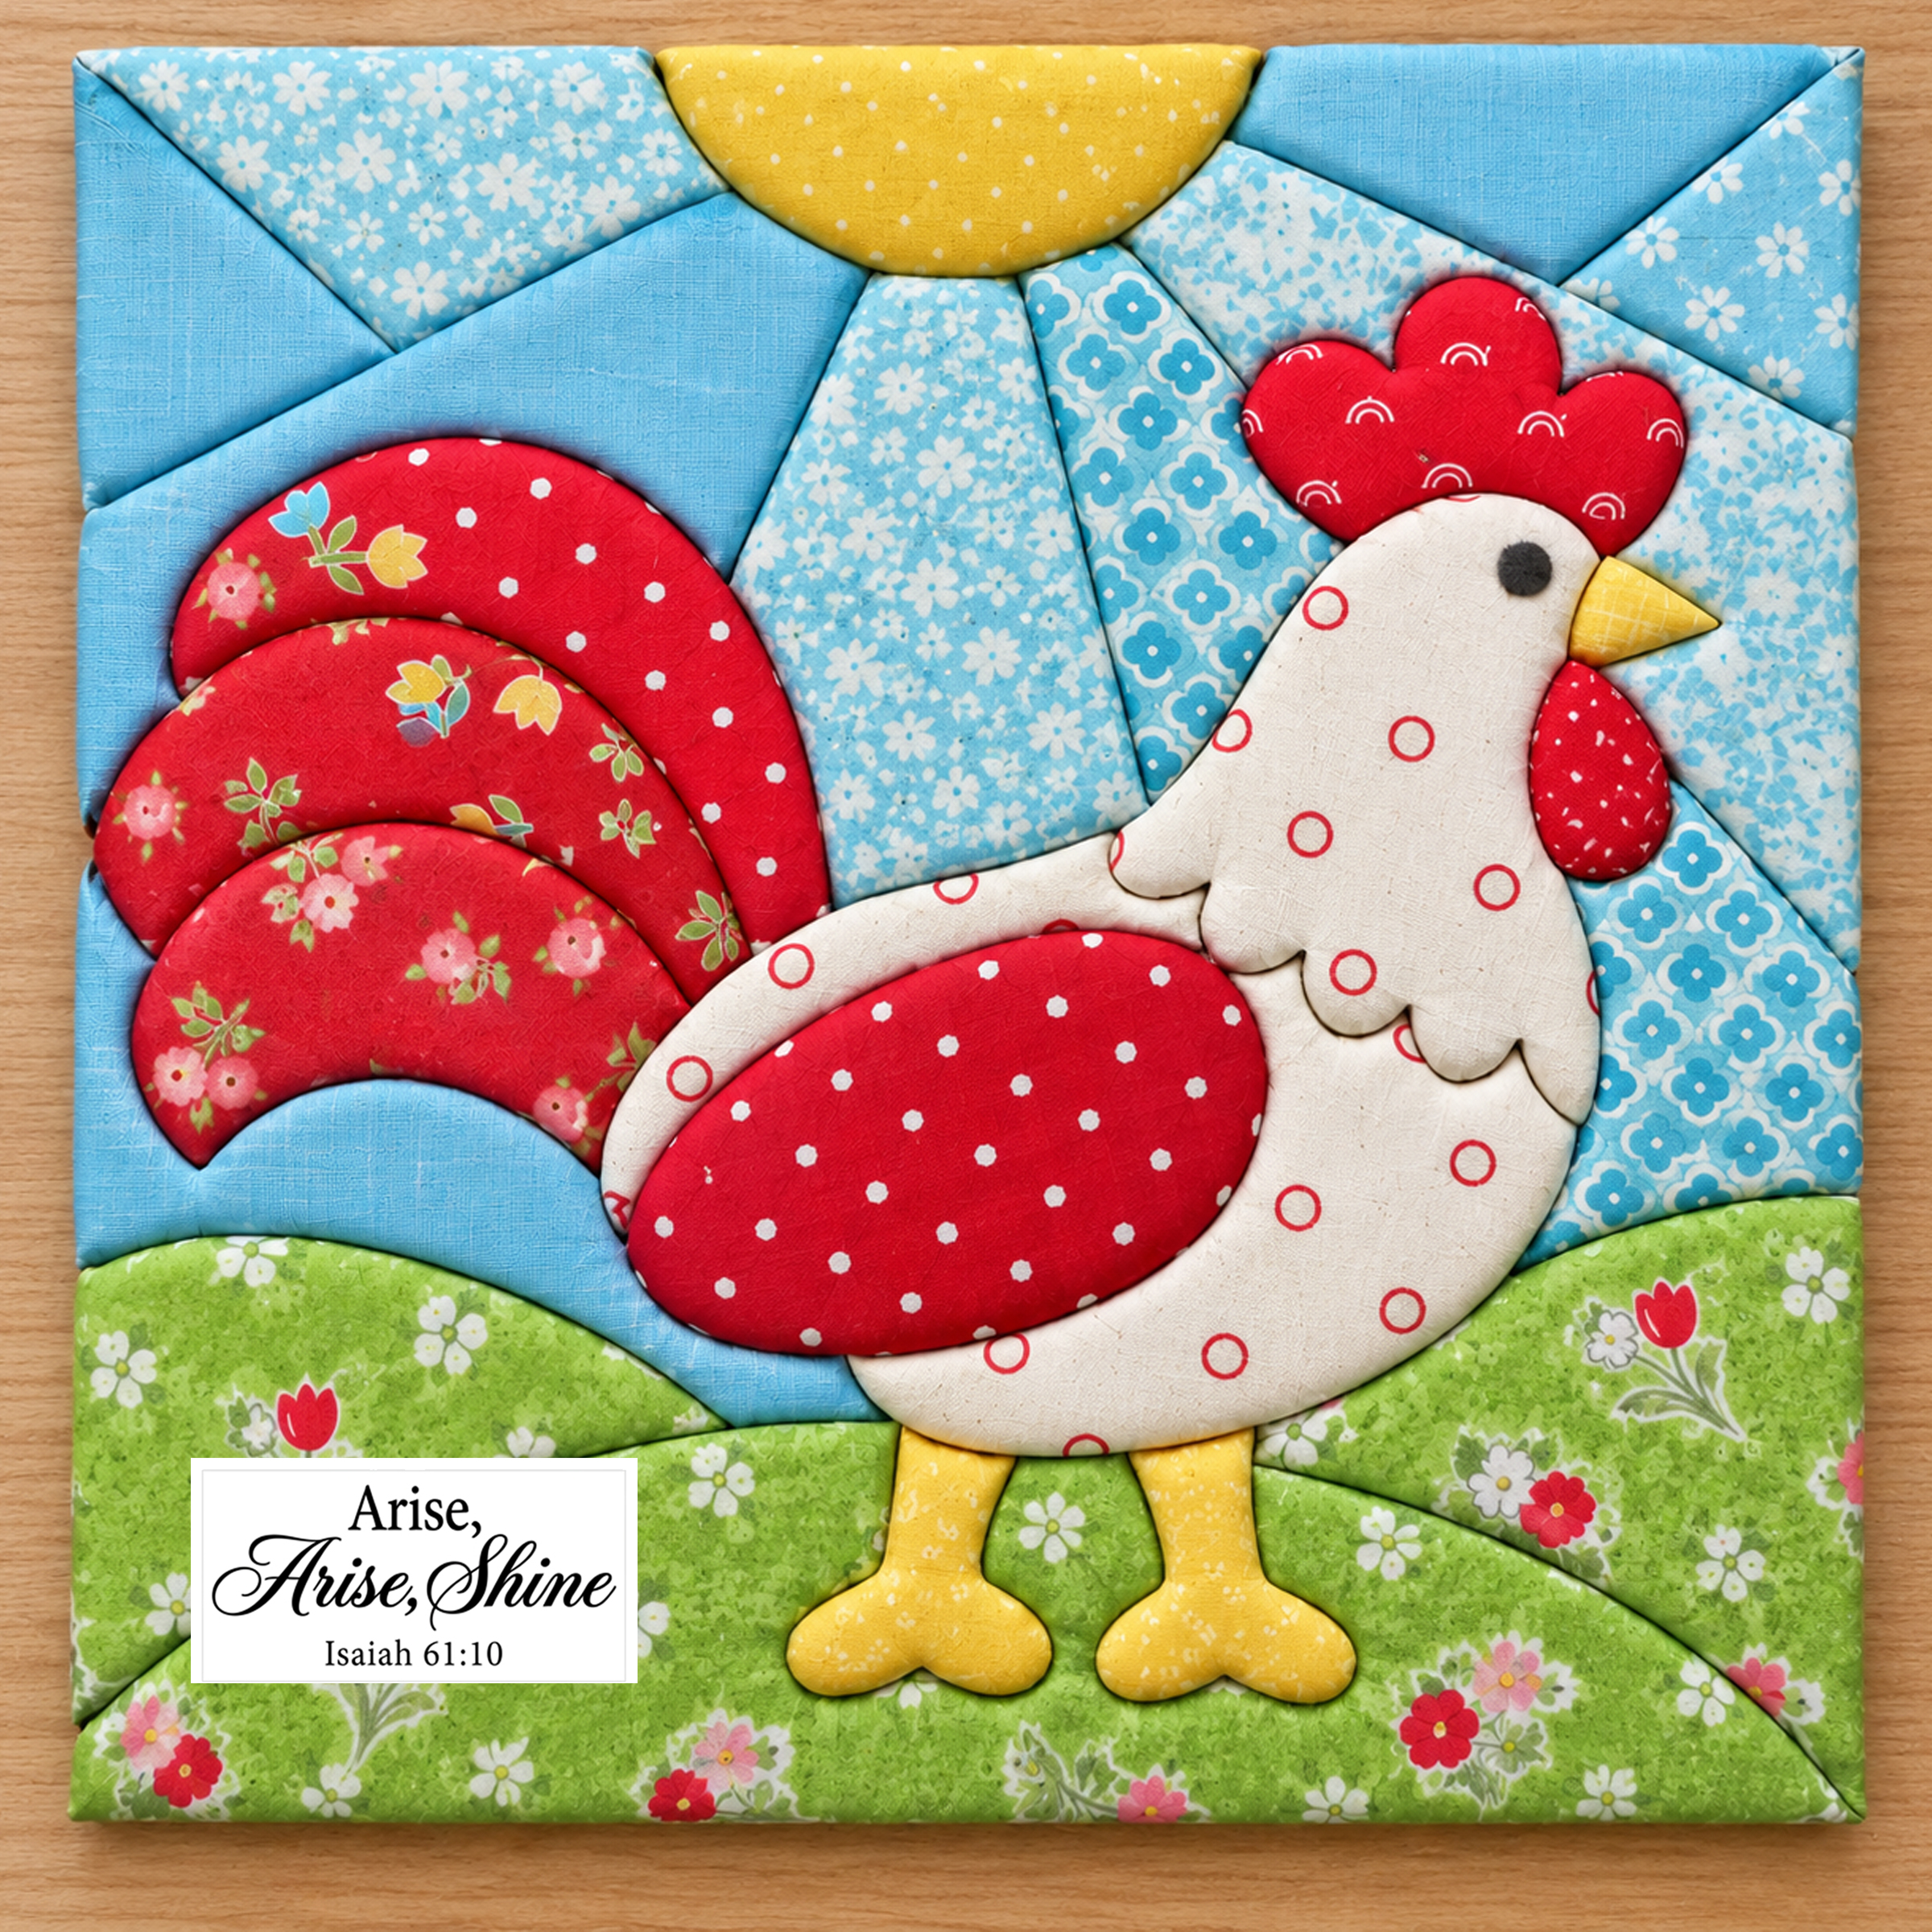
Arise is a call to action to wake up, get up, and move past fear, sadness, or hard circumstances. Shine encourages you to reflect goodness, love, and faith so that others can see it.
Be at Rest Kinusaiga
The phrase Be at Rest comes from Psalm 55:6, which says: “Oh, that I had wings like a dove! I would fly away and be at rest.”
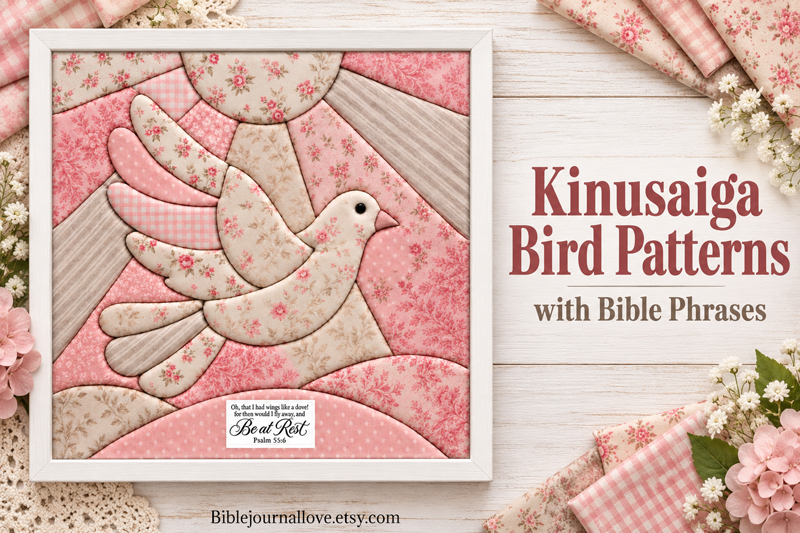
- Be is a gentle invitation to stop striving and place your worries in God’s hands.
- At Rest reminds you that even when life feels overwhelming, God is your safe place of peace and refuge.
Wings of an Eagle Kinusaiga
The image of an eagle reminds us of Isaiah 40:31. When we grow weary, we do not have to depend on our own strength. As we wait upon the Lord, He renews us and gives us strength to rise above life’s troubles, just as an eagle soars above the storm.
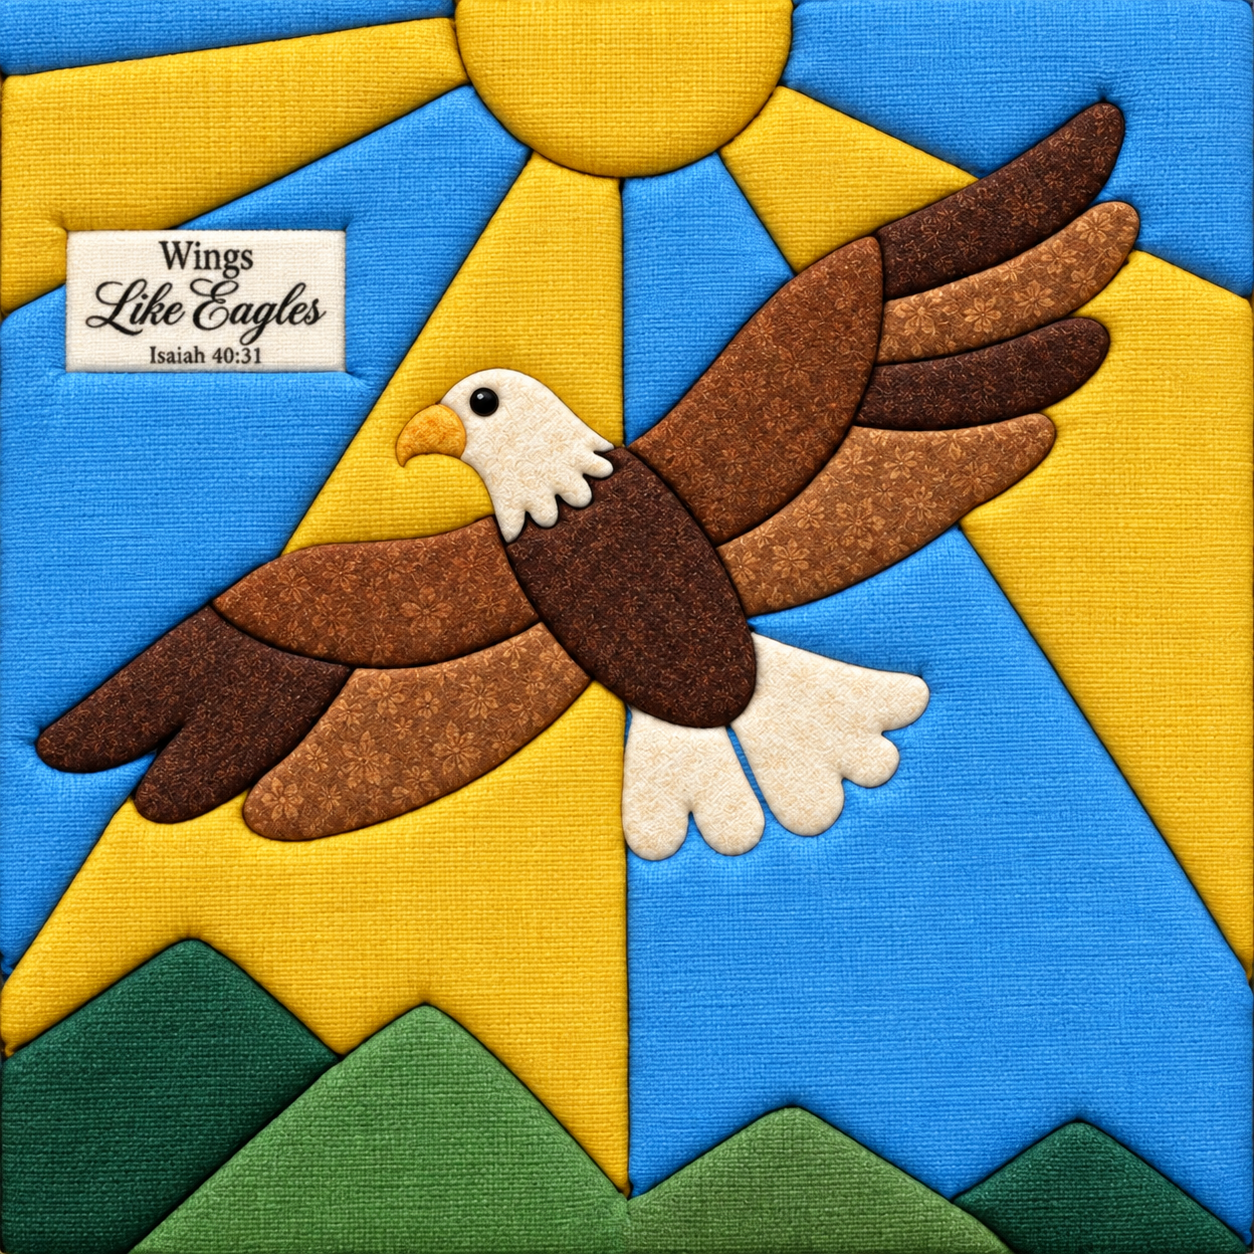
“But they who wait for the LORD shall renew their strength; they shall mount up with wings like eagles.” Isaiah 40:31
Color Note: Most of my projects feature red and aqua blue because they complement my retro décor. But you can choose any colors you love! Kinusaiga is much like painting, only your palette is fabric.
Choosing Fabric
Choose lightweight, non-stretch fabric that is easy to cut and tuck. Quilting cotton works best because it holds its shape without adding bulk. Small prints, coordinating colors, charm squares, and jelly-roll strips are especially useful. Most importantly, choose fabrics you love. The same pattern can look entirely different with a new color palette.
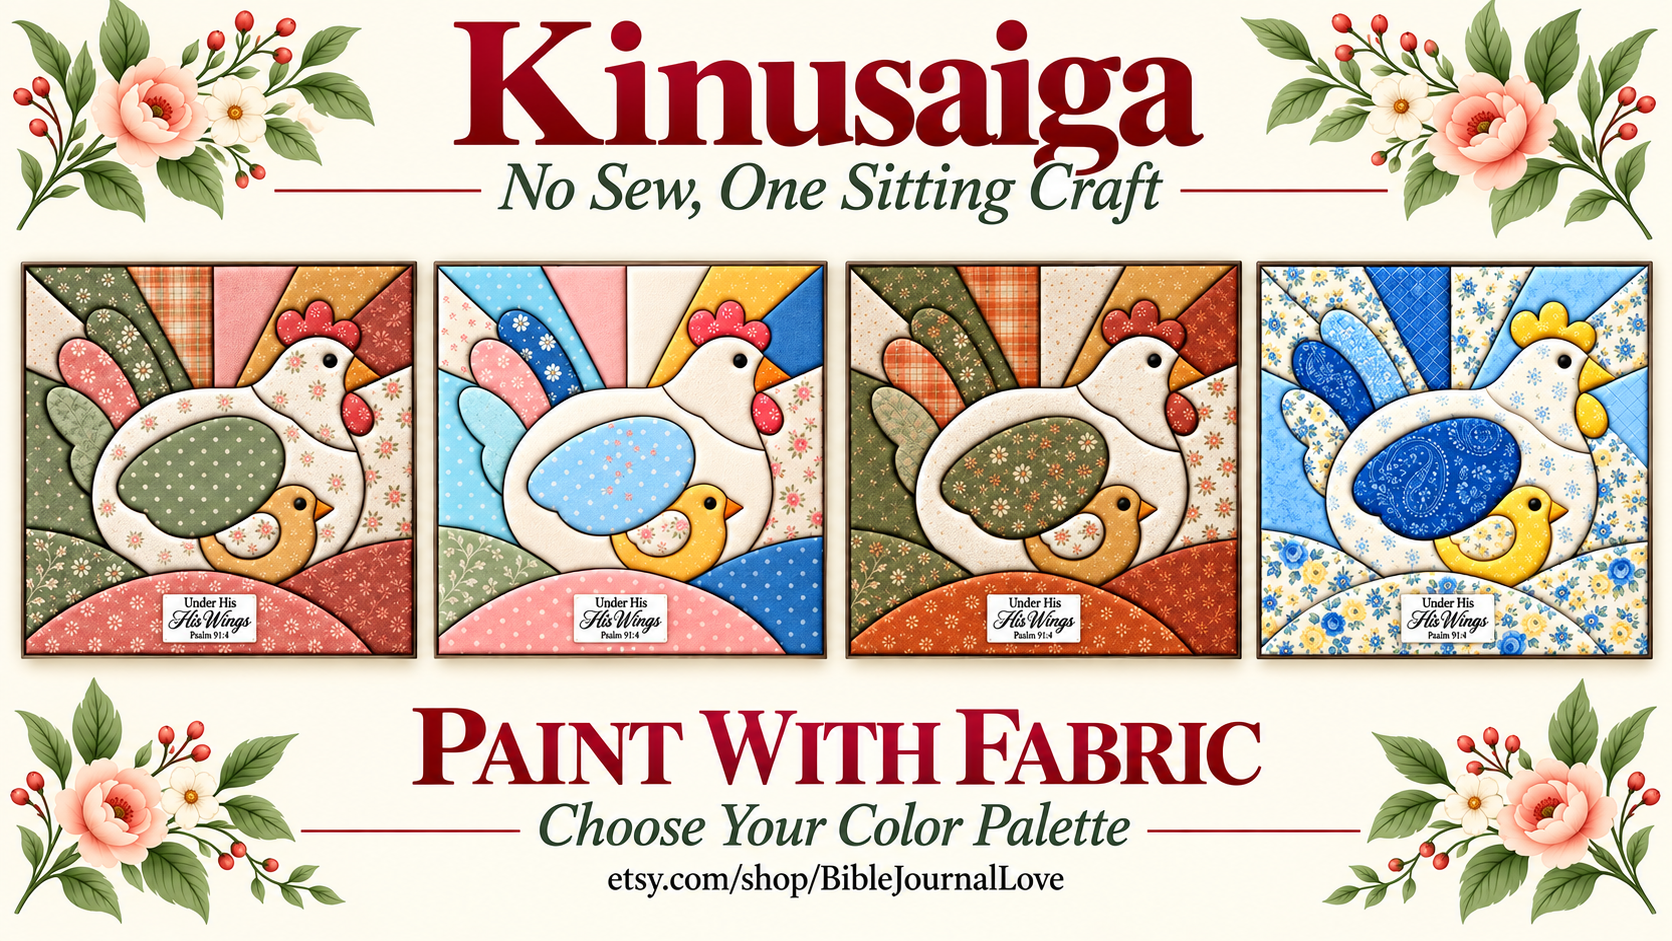
This graphic above shows the same kinusaiga pattern created with several different quilting-fabric collections and color palettes. The pattern does not change, but the fabric choices give each finished piece an entirely different personality. Use soft florals, bright retro prints, country colors, or fabrics you already have. Your kinusaiga will become a one-of-a-kind work of art.
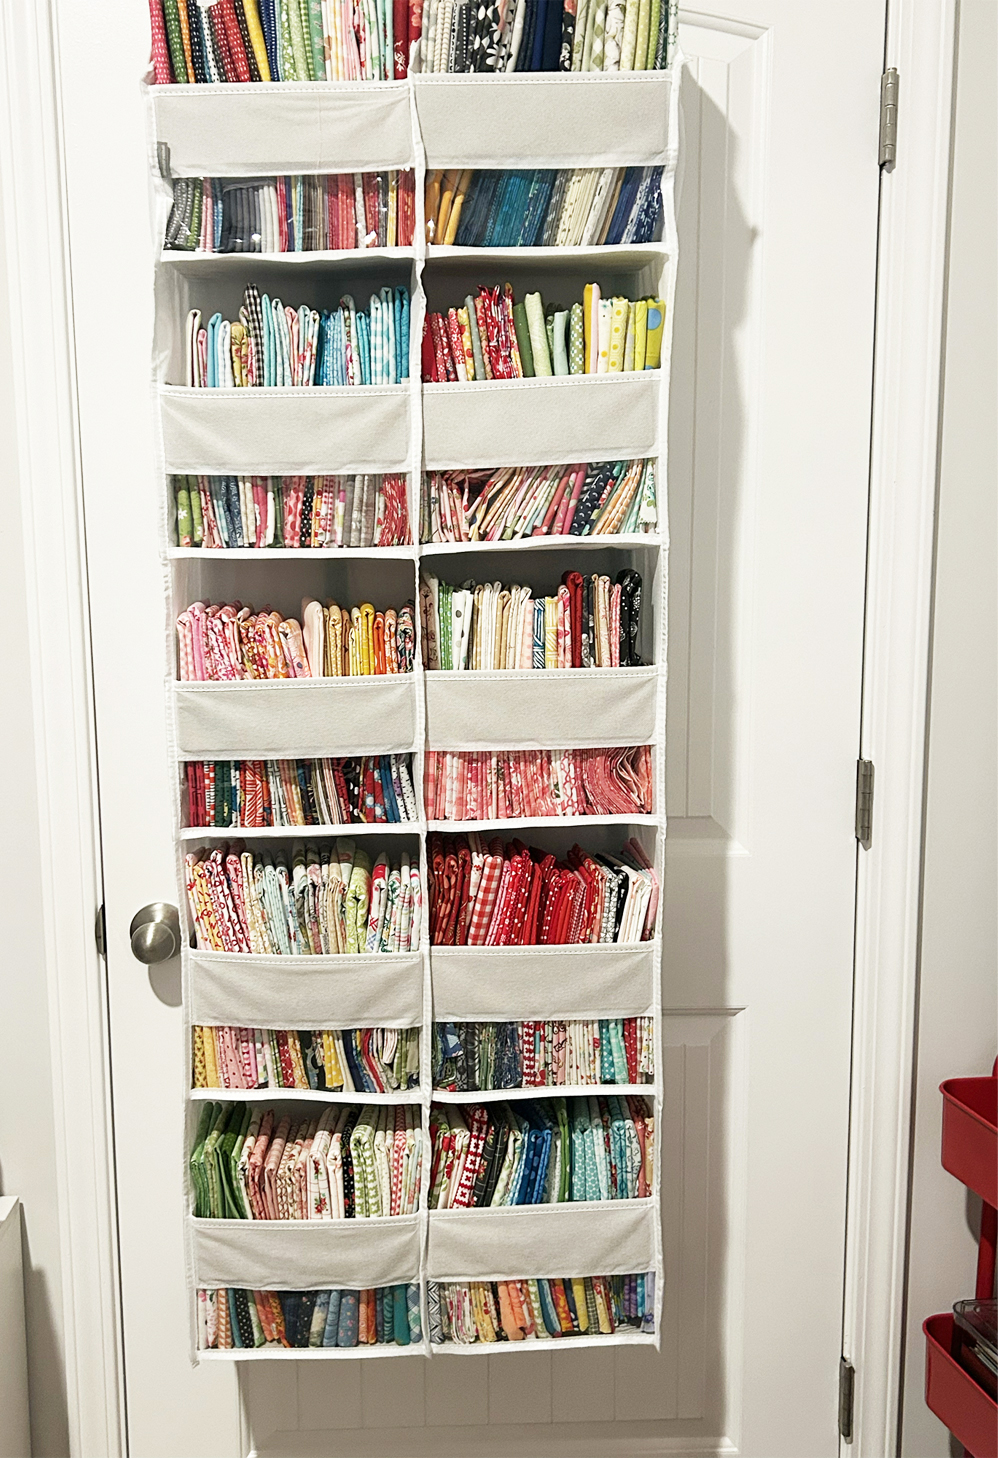 As a former quilter, I have a large fabric stash that is perfect for kinusaiga, often called painting with fabric. Almost any non-stretch fabric scrap will work, but quilting cotton is usually the easiest to cut, shape, and tuck.
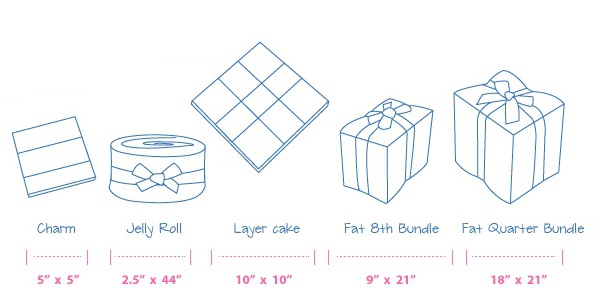
Quilting fabric is also available in convenient precut bundles. Charm packs contain coordinating 5-inch squares, while jelly rolls contain 2½-inch-wide strips. I especially recommend these precuts because the fabrics already coordinate beautifully, and the pieces are just the right size for most kinusaiga sections.
Putting the Verses on Fabric
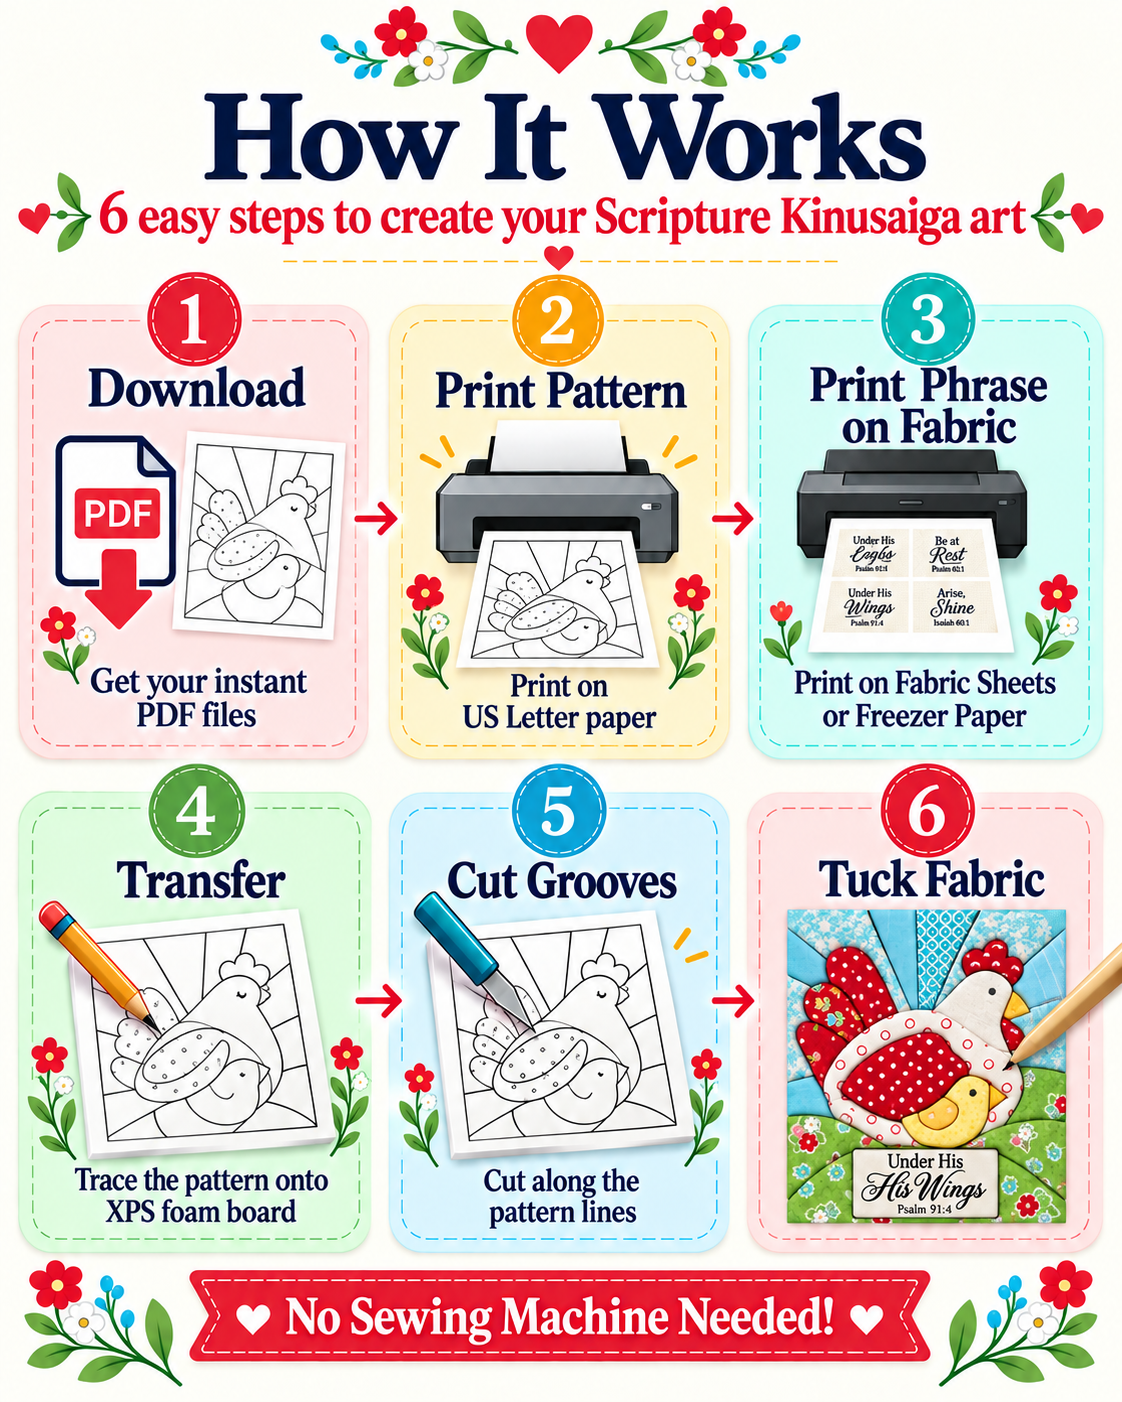
Here's the problem most crafters hit: you can't tuck a printed sheet of paper into a groove. The phrase has to live on fabric. So how do you get beautiful lettering onto a scrap of cotton?
There are a few good ways to print verses on fabric. Let me walk you through each one.
Method 1: Printable Fabric Sheets, Then Glue
The simplest and easiest method (recomended for beginners) is to use printable fabric sheets. Brands such as Printed Treasures, EQ Printables, and June Tailor offer cotton sheets with a paper backing that feed directly through your printer.
Print the phrases, peel away the backing, cut out each label, and glue it onto your finished Kinusaiga project with a thin layer of fabric glue. There is no need to cut or tuck a separate space for the phrase.
Cost: Roughly one or two dollars per sheet.
Worth it when: You want the quickest, easiest method with dependable results.
You can fit six to eight small phrase labels on one sheet, making each finished label very inexpensive.
Method 2: Ready-Made Printable Fabric Sheets
Use printble fabric sheets like abov but tuck into Kinusaiga. Brands like Printed Treasures, EQ Printables, and June Tailor sell pre-backed cotton sheets you just drop in the printer.
Cost: roughly a dollar or two per sheet.
Worth it when: you're making a batch, you want consistent results, or the freezer paper method has jammed your printer twice and you're done trying.
You can fit six to eight small phrase panels on a single sheet. That brings the real cost down fast.
Method 3: Freezer Paper + Your Home Printer
This is the cheapest method. Freezer paper is a few dollars a roll at the grocery store — shiny plastic on one side, matte paper on the other.
How it works: Cut freezer paper to 8.5 x 11 inches. Be exact, or your printer will jam.
Place it shiny side down on the wrong side of your fabric.
Press with a dry iron on the cotton setting. No steam. Work slowly until it's fully bonded — the plastic melts just enough to grip.
Trim the fabric flush to the paper edge. Snip every loose thread. A single stray thread is what jams a printer.
Feed it through your inkjet printer, fabric side up, one sheet at a time. Use the straightest paper path your printer offers — the rear feed if you have one.
Print on "best" or "photo" quality, plain paper setting. Peel the freezer paper away. Press with a dry iron for a minute or two to set the ink.
What to know: Inkjet ink isn't waterproof unless you pretreat the fabric with something like Bubble Jet Set. For wall art, that doesn't matter — you'll never wash it. Pigment-based ink holds its color in sunlight better than dye-based ink, so use pigment if your printer takes it.
Don't use a laser printer. The heat and toner don't play well with fabric.
Method 4: Stitch It by Hand
I have a slow-stitch piece hanging in my house — cardinals on a crazy quilt background, with Matthew 6:26 embroidered by hand across the bottom. I am not good at embroidery, but I love it and it reminds me every day that God will take care of me.
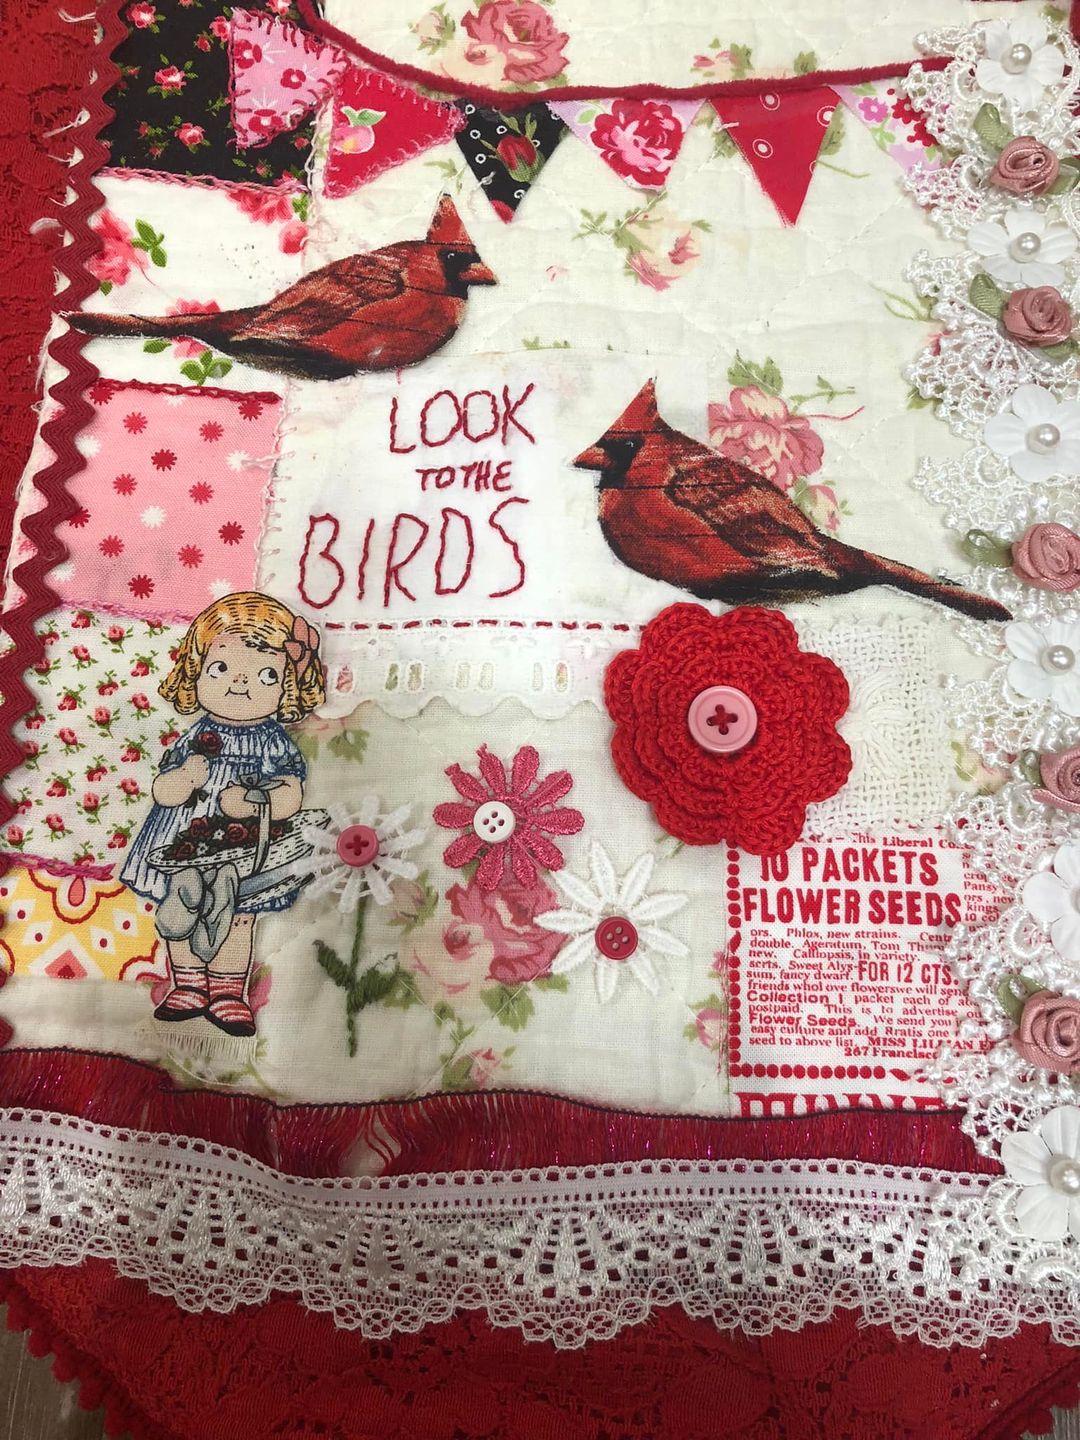
Trace your phrase onto the fabric with a water-soluble marker or a lightbox, then work it in backstitch or stem stitch with two strands of floss.
It's the slowest option by far. It's also the one people reach out and touch.
You can mix methods, too. Print the phrase, then hand-stitch a simple border around it. Or print the reference and embroider the main words.
Why This Belongs in a Bible Journaler's Hands
Bible journaling has always been about slowing down with a verse long enough to actually see it.
You know how that works. You read Matthew 6:26 fast and it's a nice thought about birds. You spend an hour painting birds into your margin and suddenly you're thinking about who feeds you, and how, and how rarely you notice.
Kinusaiga does the same thing with your hands. Cutting the grooves takes time. Tucking each piece takes time. And the whole while you're holding one short phrase in your head, turning it over.
Then you hang it on the wall, and it keeps preaching after you've put the tools away.
"Gather up the leftover fragments, that nothing may be lost." John 6:12
Your scrap bin has everything you need to start.
Kinususiga Tips
Things I Wish Someone Had Told Me First
Simple patterns turn out better than intricate ones. Big, bold shapes are your friend here.
- NEVER use styrofoam. Styrofoam is made from thousands of tiny beads pressed together. When your knife enters it, the blade does not create a clean, narrow groove. Instead, it forces the beads apart, leaving a ragged, crumbling trench.Those weak walls cannot grip the tucked fabric securely. Each time you push fabric into the groove, it widens a little more. Over time, the fabric may slowly work its way out, leaving your beautiful finished piece coming apart on the wall. Then there is the mess. Tiny white static beads cling to the fabric, your hands, your table, and everything nearby. You may be picking them out of light-colored fabric for days.
- Foam board: Get dense XPS rigid foam from a hardward store. I use the Owens Corning FOAMULAR NGX Project Panel — a pink XPS rigid foam insulation board from the building supply aisle. It comes in a 2 x 2 foot panel, cuts like butter, and one panel makes a lot of projects. Home Depo delivered to my house free. I have also use blue LuckyFoam that worked well, just not as cheap as hardare store.
- Craft Knifes: Be careful. I am a klutz and craft knife is like a rasor. You have. to change bladed often so get plenty. I use an easy blade change craft knife.
- Use the double-sided adhesive. Always. Pieces made without it go floppy. The fabric slowly works its way back out of the grooves. Every single crafter who skipped it regretted it.
- Nylon Cord creates a beautiful, finished outline around each fabric section. After all the fabric is securely tucked into the grooves, gently press the cord into those same grooves for added definition. Use 0.8 mm to 1 mm nylon jewelry-making cord.
- Cut fabric bigger than the shape. No margin, no tuck.
- Trim after tucking, not before. You'll always want a little extra to grab.
- Curved scissors work great for trimming.
- Cut center sections before outer sections. Structure first.
- One piece at a time. Peel, place, tuck, trim. Then the next.
- Snips for curves and corners: Cut small "V" shapes in tight inner corners to remove excess bulk, and make tiny snips along sharp curves so the fabric lays completely flat. Tuck up into a corner not down.
- Blunt tools only. A sharp tool shreds the foam and snags the fabric. The back of a seam ripper works well. Also the orange peelers that were give-a-ways at tupperware parties (remember them?).
- Cut fabric bigger than the shape. No margin, no tuck.
- Clean up edges: For border pieces, extend your cuts past the edge and wrap the extra fabric around to the back of the foam board for a neat, professional finish.
- Read pattern reviews: Be aware many Kinusaiga pattern online are AI and never tested for ease of use and are impossible to complete. This matters more than people expect. Think coloring book, not stained-glass cathedral.
KINUSAIGA PATTERN WARNING FOR BEGINNERS
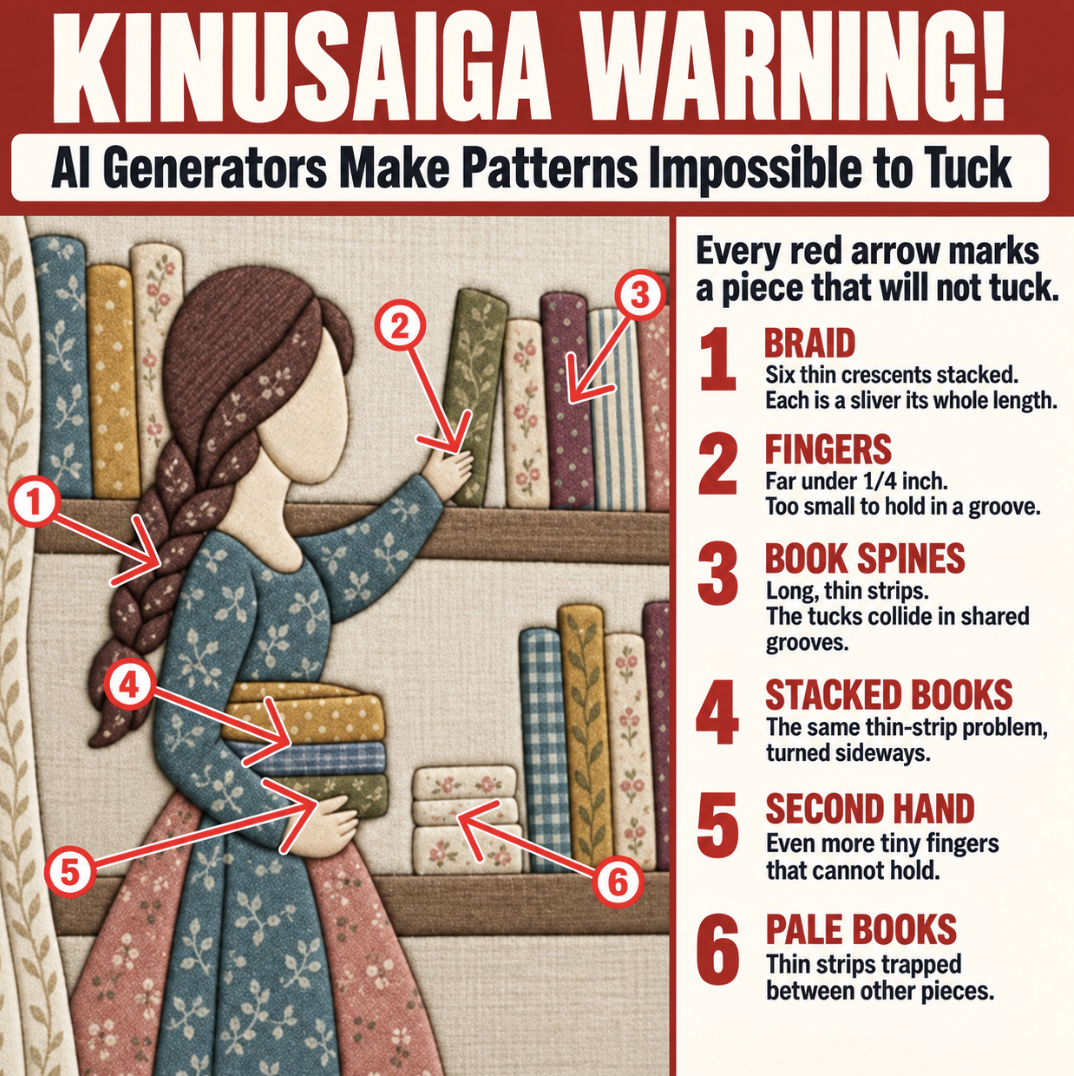 Kinusaiga is becoming very popular, and many beautiful new patterns are appearing for sale. Some are created or enhanced with artificial intelligence and may never have been physically tested with fabric and foam board.
That does not automatically make them bad patterns. Experienced Kinusaiga artists can often simplify or adapt a difficult design.
Beginners, however, may not yet recognize which details will be challenging to cut and tuck.
Very narrow sections can become difficult because the tucked edges meet underneath. This may cause bunching, bulging, fraying, or fabric that will not stay in place.
Before purchasing a pattern, look carefully for:
- Extremely narrow sections or long, thin strips
- Tiny feathers, petals, fingers, or facial details
- Sharp interior angles and tight curves
- Lines that end without forming an enclosed section
- Too many small pieces crowded into one area
You may also want to ask the seller whether the pattern has been physically made and tested—not simply whether it was digitally designed.
This is not meant to discourage anyone from using AI or trying detailed patterns. It is simply a reminder that a beautiful image is not always a beginner-friendly Kinusaiga pattern.
For your first projects, choose large, bold, completely enclosed shapes with gentle curves—more like a simple coloring book than an intricate stained-glass window. A well-tested pattern lets you enjoy learning the craft instead of struggling with details that were never designed to be cut and tucked.
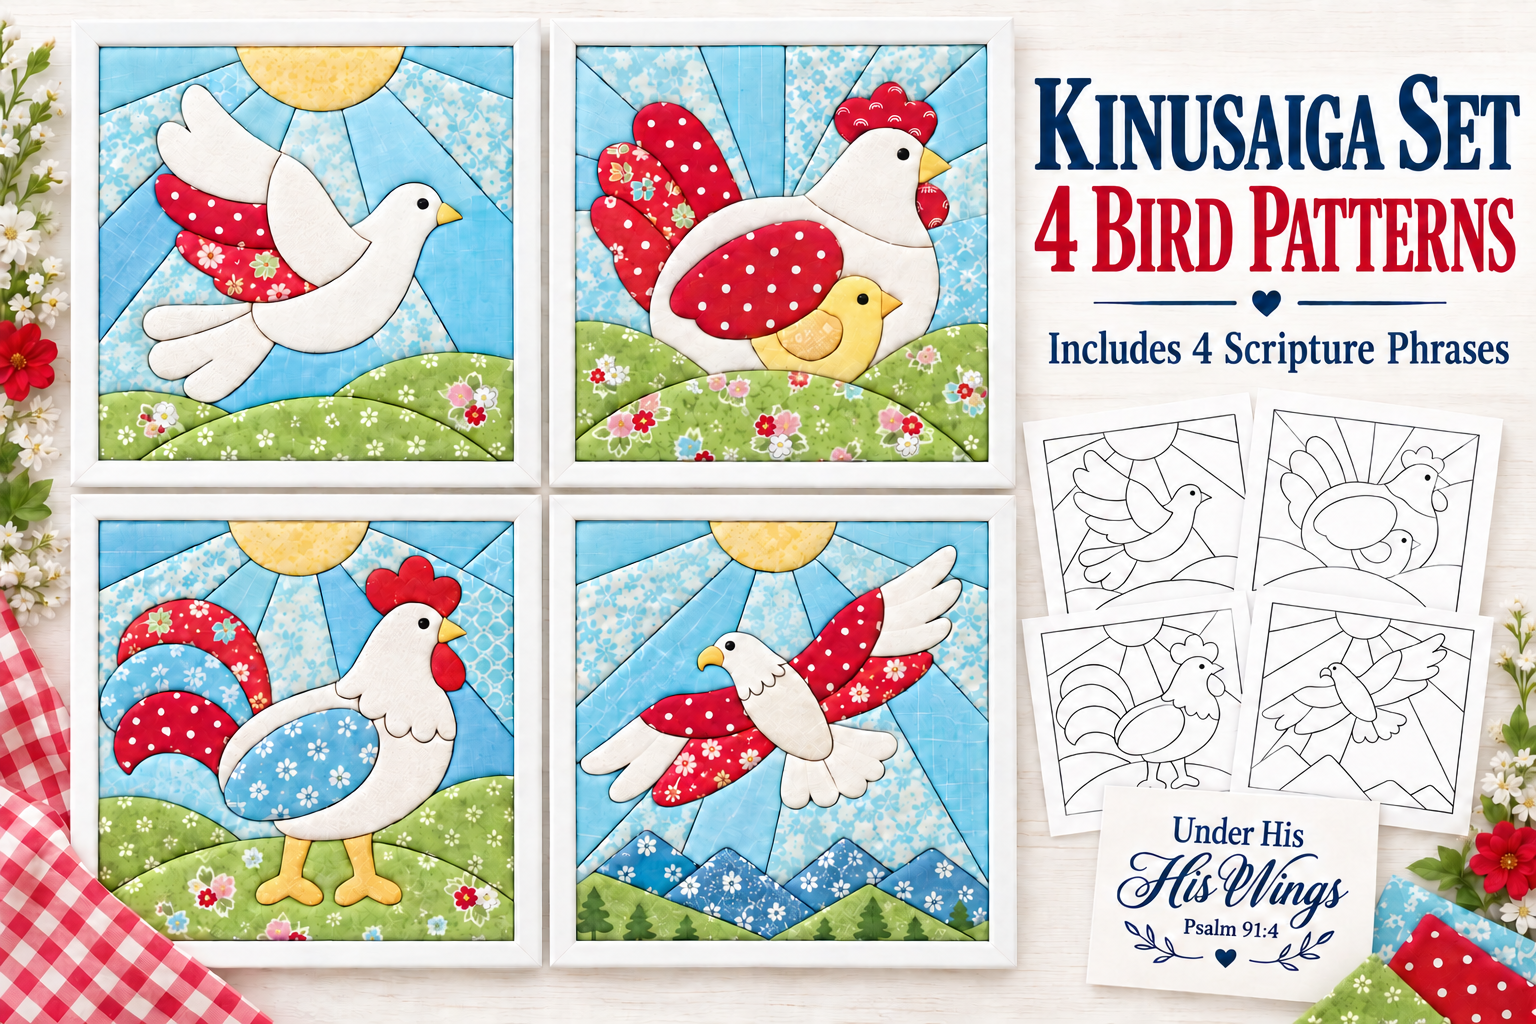
I've been building Kinusaiga patterns designed around Scripture — each one includes the panel sized and ready for your phrase, plus a fabric guide so you know which scraps to reach for.